
Frontend Optimizations at Tatari Inc.
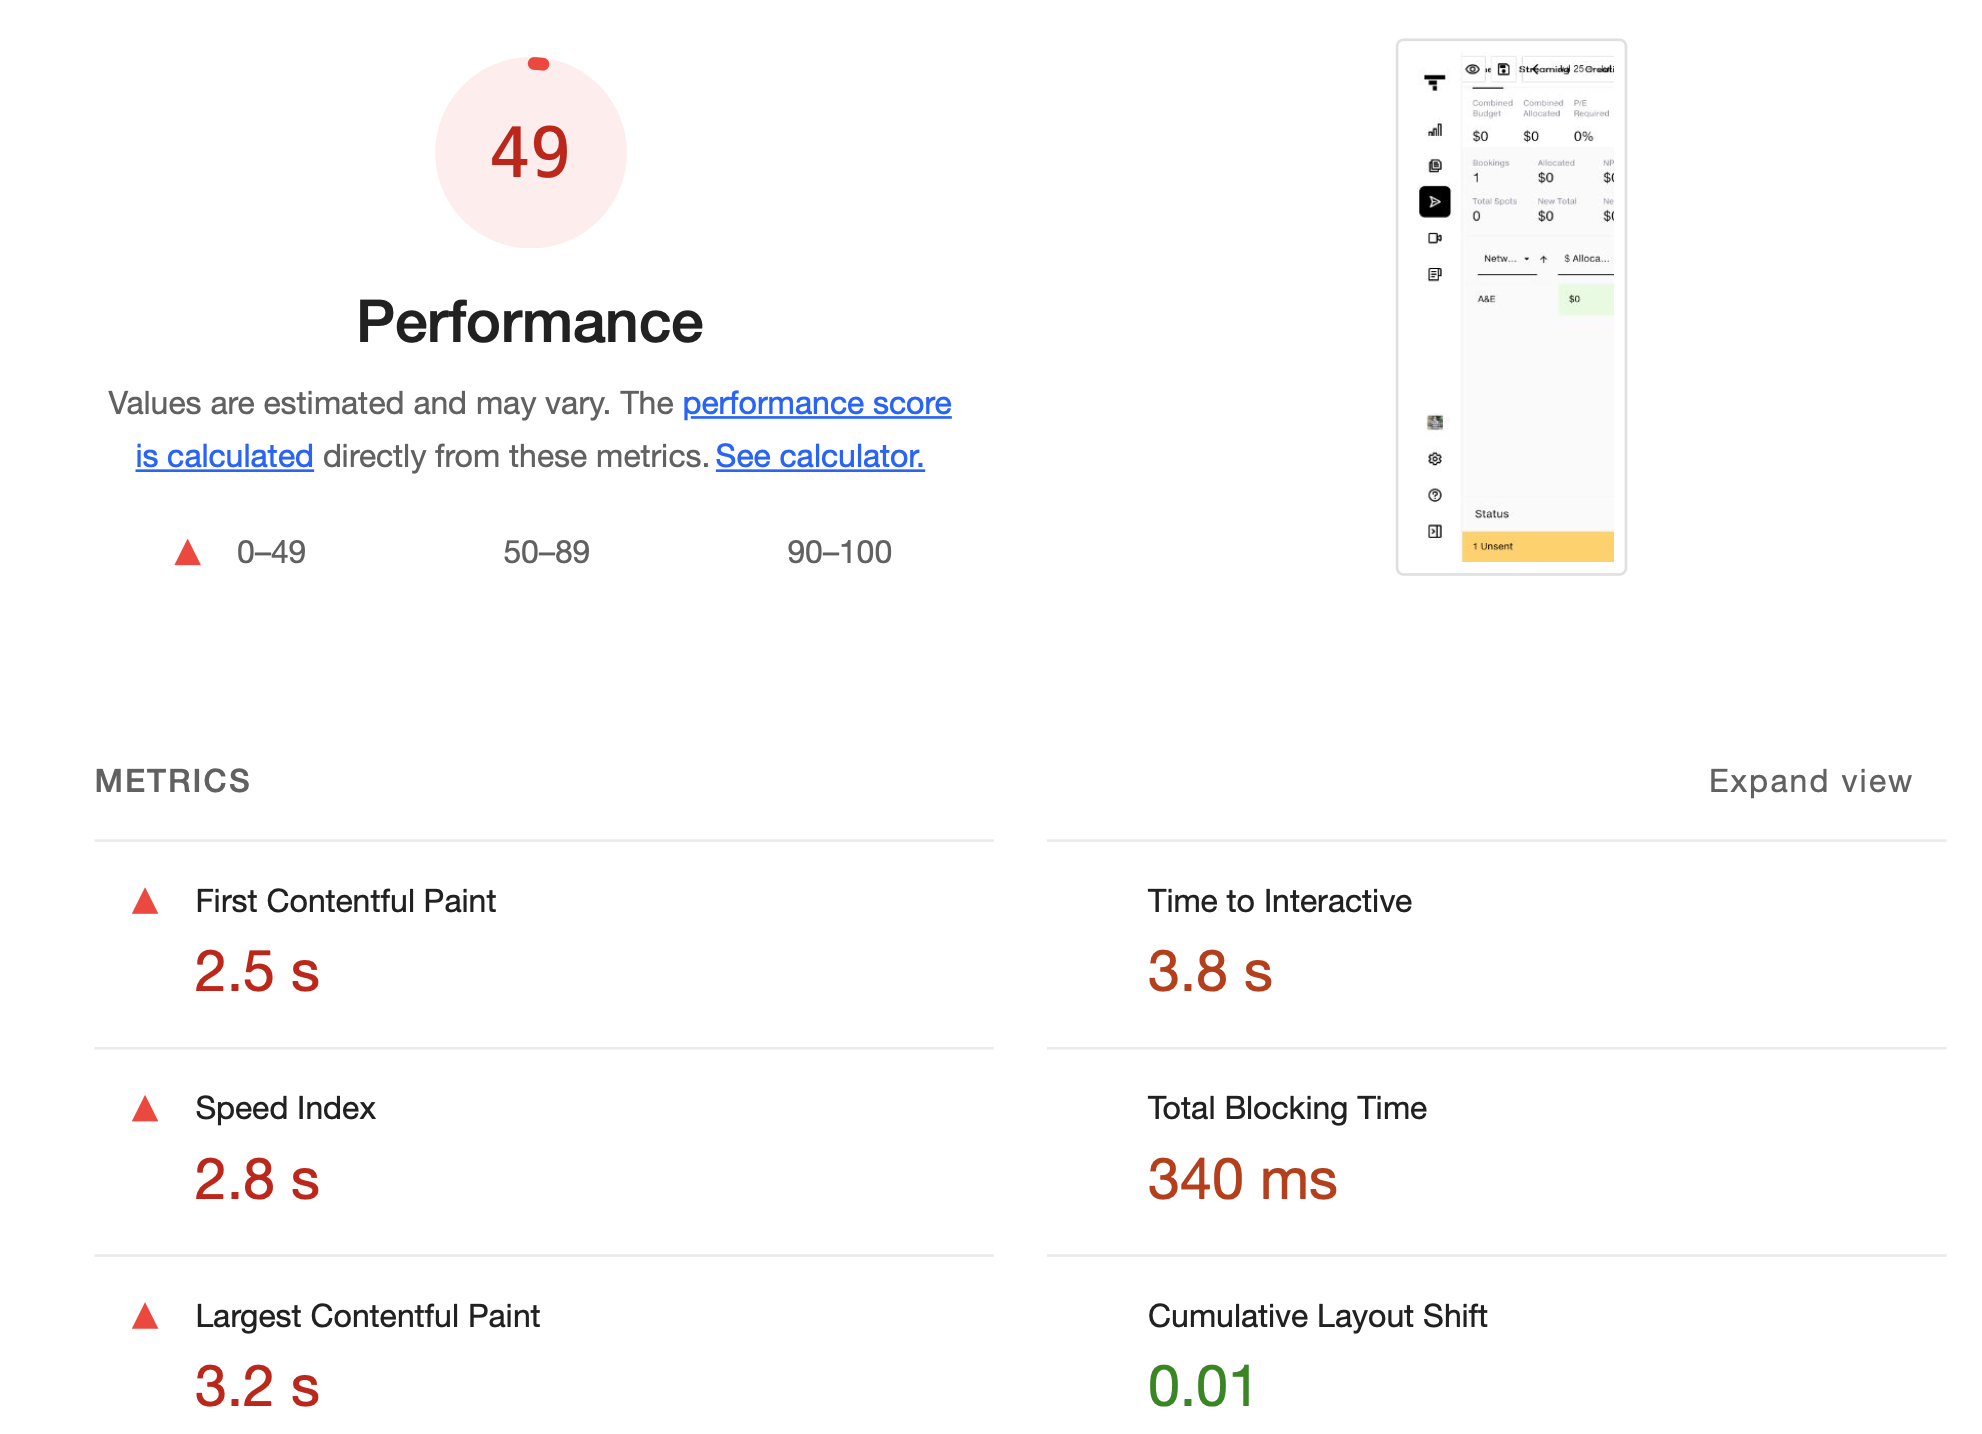
With a growing frontend codebase incorporating various external libraries, we noticed an increase in our bundle sizes and build times. This alarming trend (along with the subpar Lighthouse rating of 49, attached below) led us to undertake a project focused on a series of frontend enhancements and optimizations, which we will cover in this blog.
Background
Our current process includes the following steps:
- Configure Webpack (5.40.0) to pack our React (TypeScript) application and produce a series of bundles, i.e. one entry point per each unique app route, using a series of loaders for e.g.
ts-loaderto transpileTSXfiles. - Optimize and minify the compiled JS and CSS using the
TerserWebpackPluginand theCssMinimizerPlugin, respectively. - Serve the
/build(static assets) through a Node server using the view enginepug.
Note: For styling we primarily employ Styled Components (CSS-in-JS)
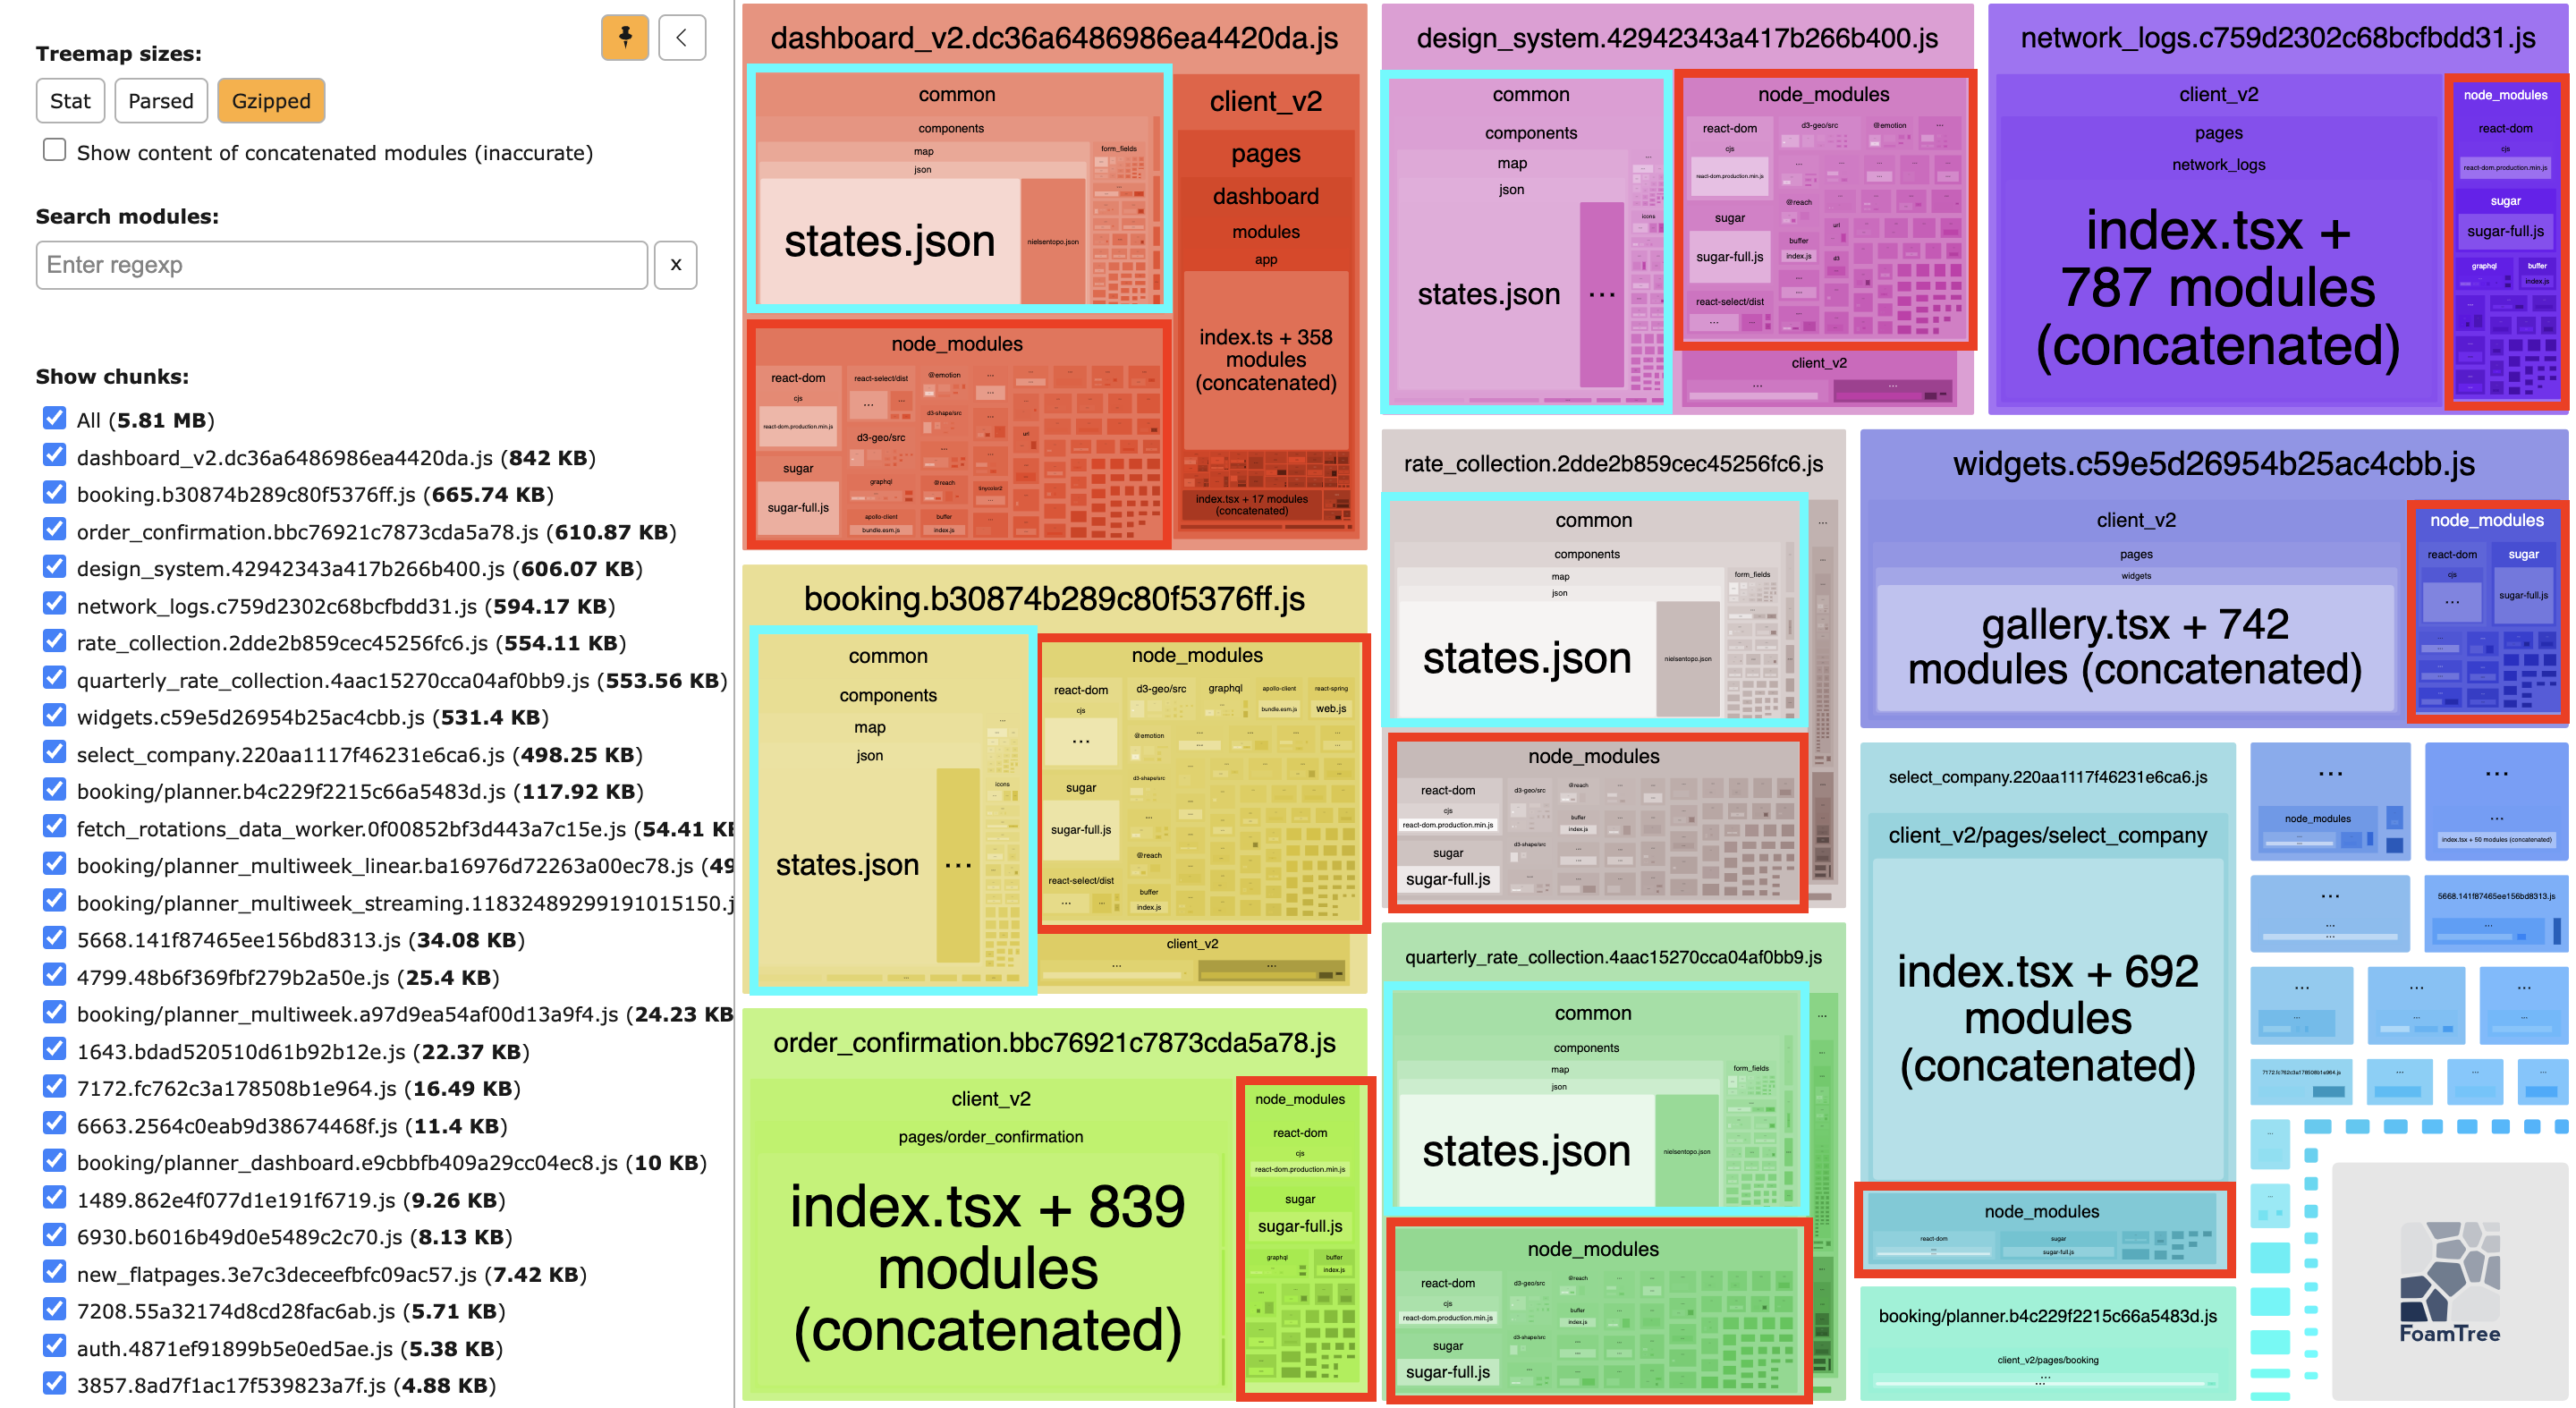
Prior to making any changes, we first wanted to analyze and profile our existing setup. To do that, we used the WebpackBundleAnalyzer plugin to view the relative heaviness of our bundle files.
Below are the results.
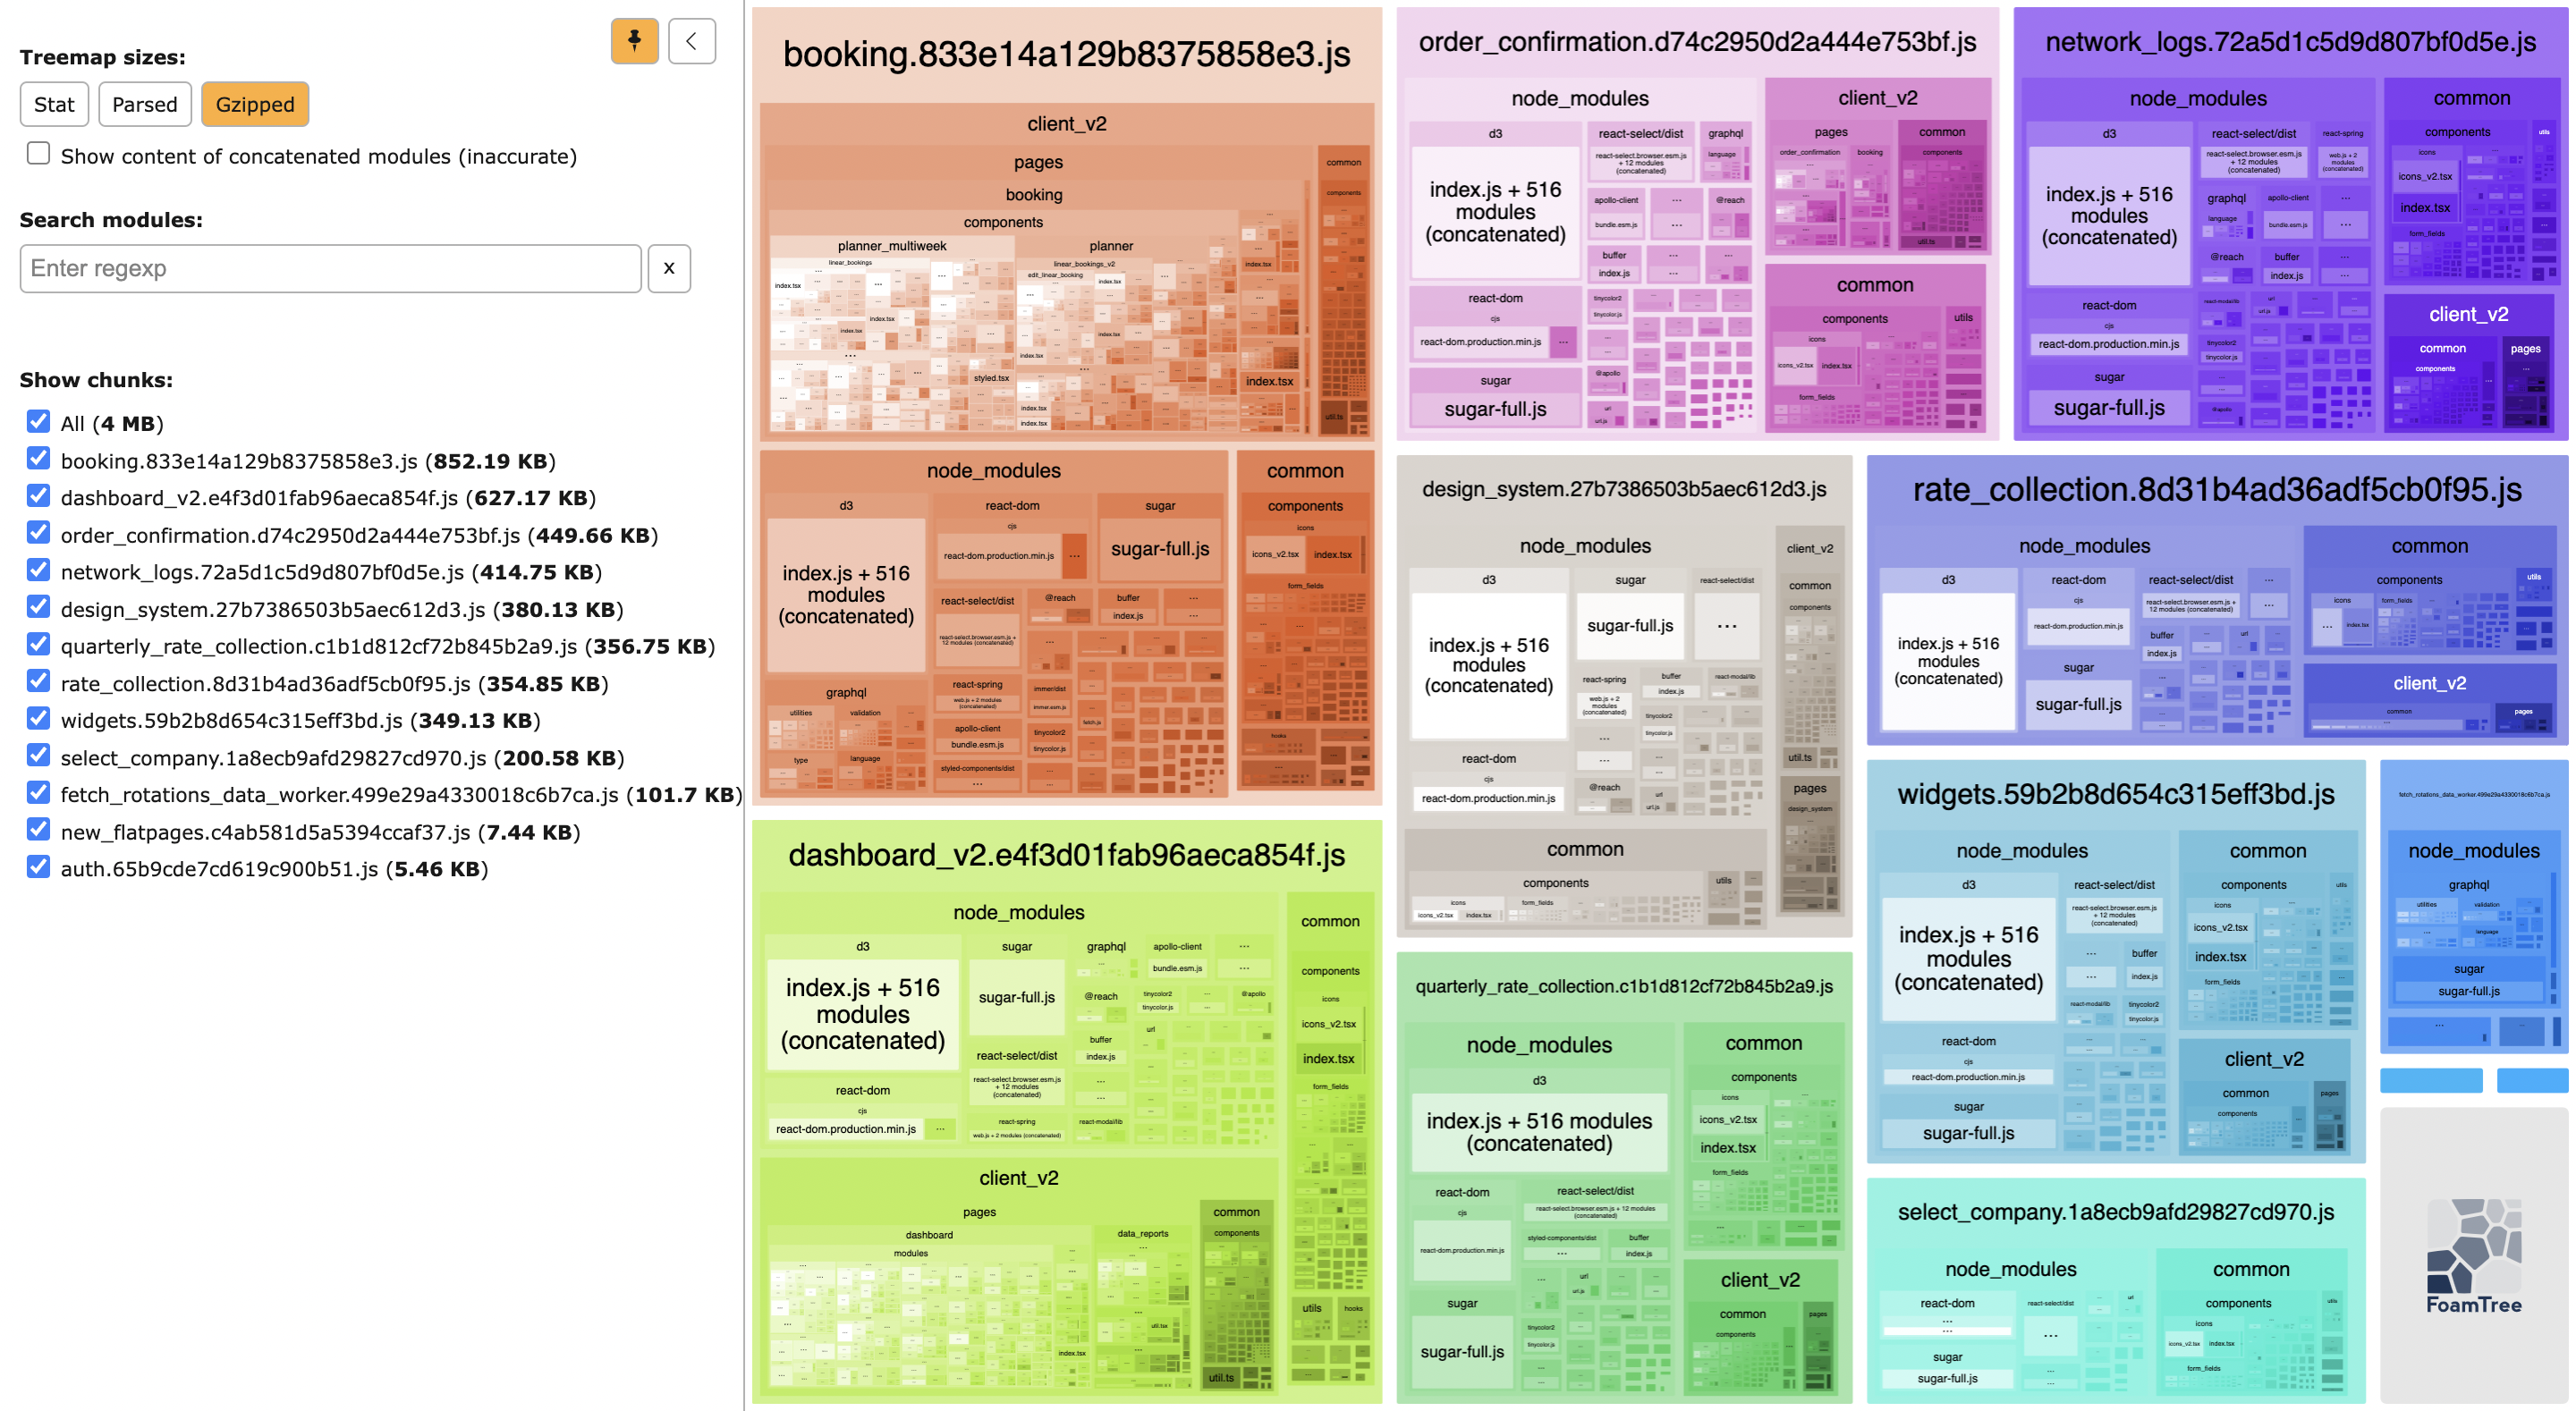
Given the large sizes of our app bundles, Dashboard and Booking in particular, splitting them up into smaller parts that can be loaded dynamically was a natural first improvement to undertake. As a proof of concept we selected one of our smaller modules, the Tatari Design System (TDS) component gallery, which was well-suited for route-based code-splitting, i.e. lazily loading each demo component, instead of loading the entire TDS chunk at once.
Route-Based Code-Splitting
So we went ahead and imported our separate TDS components (under /demos) using React.lazy().
// Lazy loader helper
function importDemoComponent(fileName: string) {
  return React.lazy(() => import(`../demos/${fileName}`).catch(() => import(`../demos/not_found`)));
}
Well, this would have been too easy. With this change, our modules were seemingly being imported dynamically, but the bundle was not split up into individual demo modules, as expected.
It was time to put on the lab coat! 🥼
We currently use the ts-loader plugin as a typescript compiler that picks up the config from tsconfig.json and transpiles accordingly. By default within the config’s compilerOptions, module was set to commonjs & dynamic imports import() is supported when the module is set to esnext, commonjs, amd, system, or umd.
However, when using code-splitting with Webpack, the module flag must be set to esnext. Why? For code splitting to work, these dynamic imports must be left as-is and not be transpiled by TypeScript. Changing the setting to esnext preserved the dynamic imports in the output for Webpack to handle and perform code splitting.
As an extra complication, enabling module=esnext ended up conflicting with our resolveJsonModule setting, unless the moduleResolution=node was also present in the config.

But, what is module resolution?
“It is a process that the compiler uses to find out what an import refers to. Basically, what “shape” is the module? Read more here.”
Setting the moduleResolution=”node” created a separate issue with our way of importing the CommonJS modules!
How things led us to enabling esModuleInterop?
For moduleResolution=”node” to work, we needed to fix a number of imports throughout our codebase, where we required some legacy CJS modules, e.g. import cookieSession = require('cookie-session'). After changing such import to import * as cookieSession from ‘cookie-session’, Webpack prompted us to enable allowSyntheticDefaultImport flag which just suppresses the prompt! (How? That’s next!)
This now created another problem, the cookieSession() was not callable! As with the syntax
import * as cookieSession from ‘cookie-session’, it (namespace import) needed (according to the es6 spec) to be a plain object and not a callable().
All of this occured because of the typical export = behavior of the CJS module, cookie-session. We wanted to make it a default export and should be able to use it like import cookieSession from ‘cookie-session’ and be also able to call cookieSession();
That’s where the esModuleInterop flag comes in! It’s a bit more advanced than the allowSyntheticDefaultImport flag and also enables the same when itself is enabled.
So what does it do?
It enables the use of CJS modules as per the ES6 Module Specs. In layman terms, it wraps the exports = thingy into a default export! Super crazy!
Check this:
var __importDefault = (this && this.__importDefault) || function (mod) {
    return (mod && mod.__esModule) ? mod : { "default": mod };
};
As we can see above, it wraps the export into a default export if the module is not an es6 module. Simple. So with this flag enabled, we were able to get rid of the import issue for CJS modules like, cookie-session.
Post this change, we started to see separate chunk files being made for our tds module within the build! 🥳
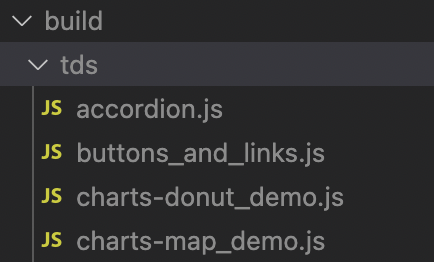
Noticed the unique naming?
That’s becuase we introduced webpackChunkName into our dynamic import syntax!
// Lazy loader helper
function importDemoComponent(fileName: string) {
  return React.lazy(() =>
    import(/*webpackChunkName: "tds/[request]"*/ `../demos/${fileName}`).catch(() => import(`../demos/not_found`))
  );
}
Result: Our design_system bundle was split up into separate demo component files, now correctly lazy-loading based on their route!
With a successful POC, we were ready to enable code-splitting for our bigger modules, e.g. dashboard and booking.
When importing modules dynamically with React.lazy(), there can be a brief loading delay, so it’s a good opportunity for React’s <Suspense> to render a spinner. For example:
....

const PlannerDashboard = React.lazy(() =>
  import(/*webpackChunkName: "booking/planner_dashboard"*/ 'route_to_planner_dashboard')
);
const PlannerMultiweek = React.lazy(() =>
  import(/*webpackChunkName: "booking/planner_multiweek"*/ 'route_to_planner_multiweek')
);

....
....

render(
    <React.Suspense fallback={<TatariSpinner withOverlay />}>
        <Router>
            <PlannerDashboard/>
            <PlannerMultiweek/>
        </Router>
    </React.Suspense>
);
It was now time to visualize the bundles!
Success! The root dashboard and booking bundles shrunk, however, we could see the presence of node_modules and our common lib being duplicated throughout the bundles 🧐
So, the next logical step was to extract out node_modules and our common code into their own separate chunks and import them in a deferred fashion (asynchronously), so that they are not render blocking.
Splitting Chunks using Webpack
To extract shared code while deduplicating its usage throughout, we turned to the SplitChunksWebpack plugin. Tweaking the default settings a bit, we were able to extract out our node_modules into its own chunk named libs.js, and our shared components & utils into a common.js chunk.
Below is what our Webpack’s splitChunks configuration looks like:
optimization: {
    ....

    splitChunks: {
      chunks(c) { return !['fetch_rotations_data_worker', 'auth'].includes(c.name); },
      // excluded some of our lightweighted entry points
      minSize: 20000, // Minimum size (bytes) for a chunk to be generated
      minChunks: 1, // Minimum times must a module be shared among chunks before splitting.
      enforceSizeThreshold: 50000, // size threshold at which splitting is enforced.
      cacheGroups: {
        vendor: false,
        vendors: false,
        default: false,
        // not using Webapack's predefined chunks (above)
        libs: {
          name: 'libs',
          test: path.resolve('node_modules'),
          priority: -10,
          reuseExistingChunk: true,
        },
        common: {
          name: 'common',
          test(module){
            // Excluding `commmon/style` to ensure [style-loader, css-loader] picks them (.css) up to inject into the DOM.
            return (
                module.resource &&
                !module.resource.includes('common/style') &&
                module.resource.includes(path.resolve('common'))
            );
          },
          priority: -20,
          reuseExistingChunk: true,
        },
      },
    },

    ...
}
Subsequently, we added script tags to load these new files into our pages in a “deferred” fashion.
What help did defer do?
- The defer attribute tells the browser not to wait for the script. Instead, the browser will continue to process the HTML, build DOM. The script loads “in the background”, and then runs when the DOM is fully built (but before
DOMContentLoadedevent).- Defer ensures that the relative order of execution of script remains same even though they might differ in their (async) download times. E.g. a small JS script (relatively ordered after a long JS script) might finish loading before the long one but both their execution will be in the same order as mentioned in the codebase, i.e. Long.JS will execute prior to Short.JS (in this case).
With the SplitChunksWebpack plugin applied, let’s review the WebpackBundleAnalyzer results below.
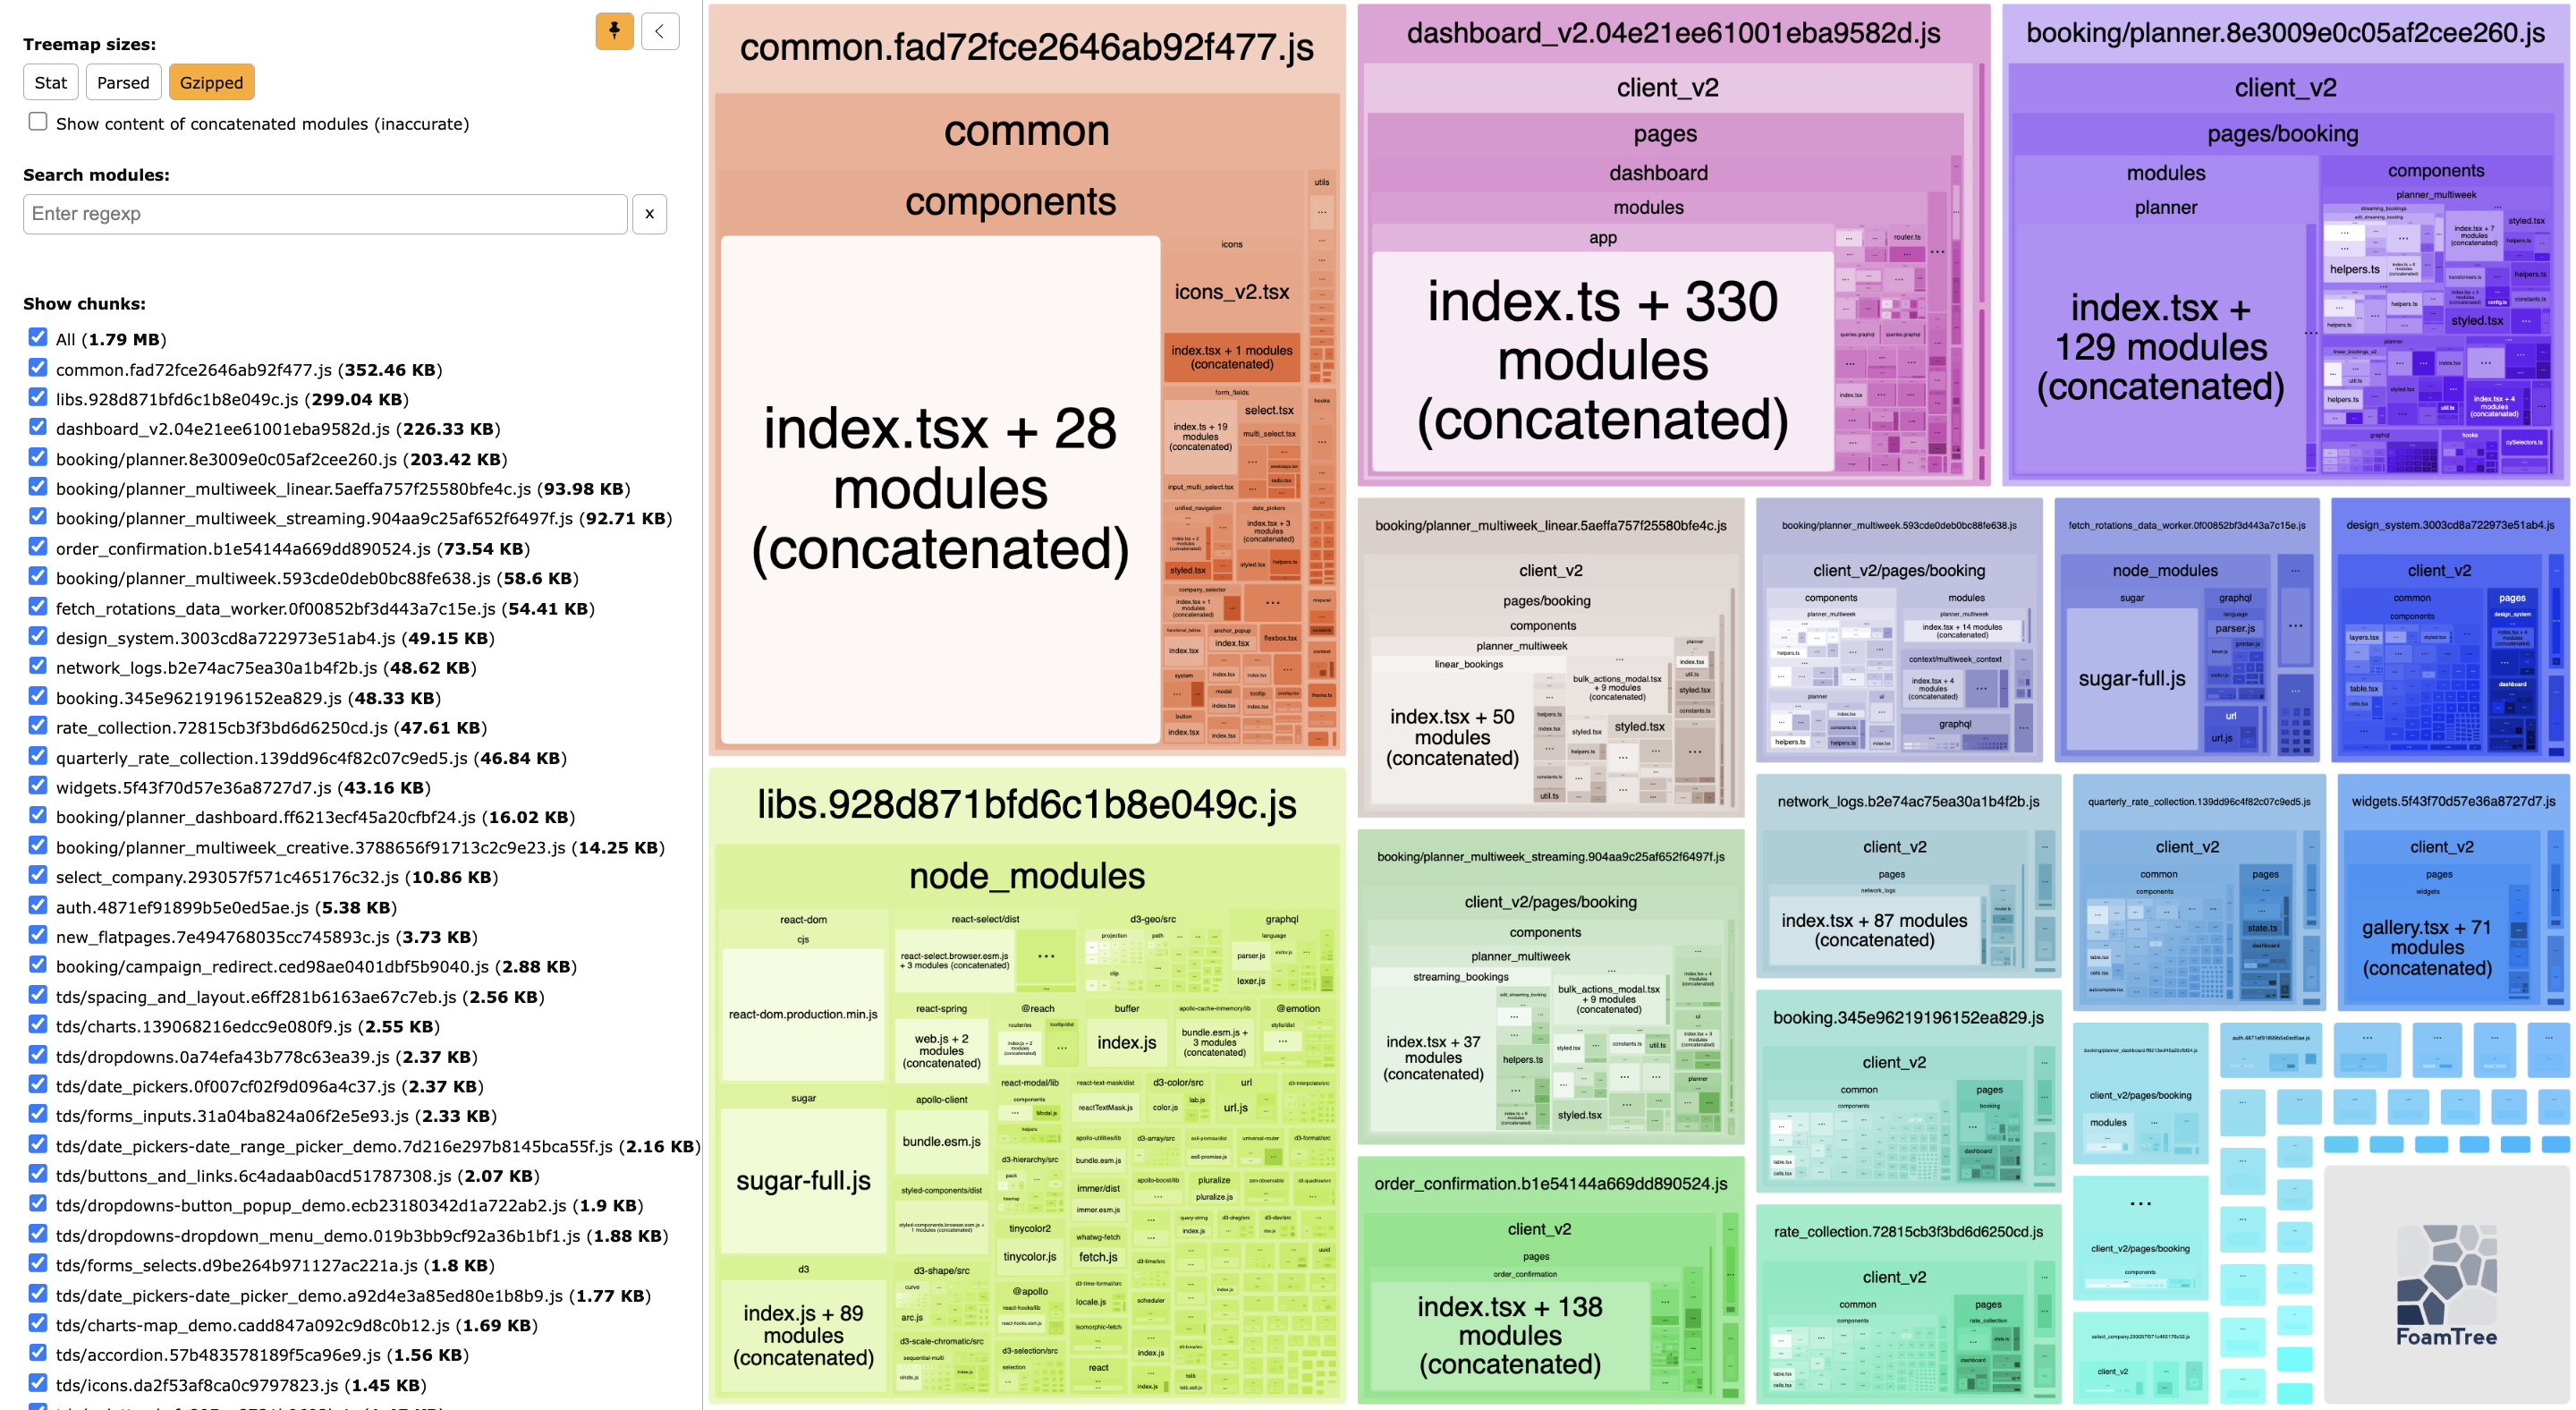
We significantly reduced the size of our entry point bundles!
Content-Encoding: Gzip
So far, so good, but we weren’t done yet! Another improvement was the addition of compression, which proved fairly easy to retrofit. Within our Node server layer, we enabled the use of the compression middleware to serve the response with the header: content-encoding: gzip.
It attempts to compress response bodies for all request that traverse through the middleware. Under the hood, it creates a compressed stream of response and sets the Content-Encoding header.
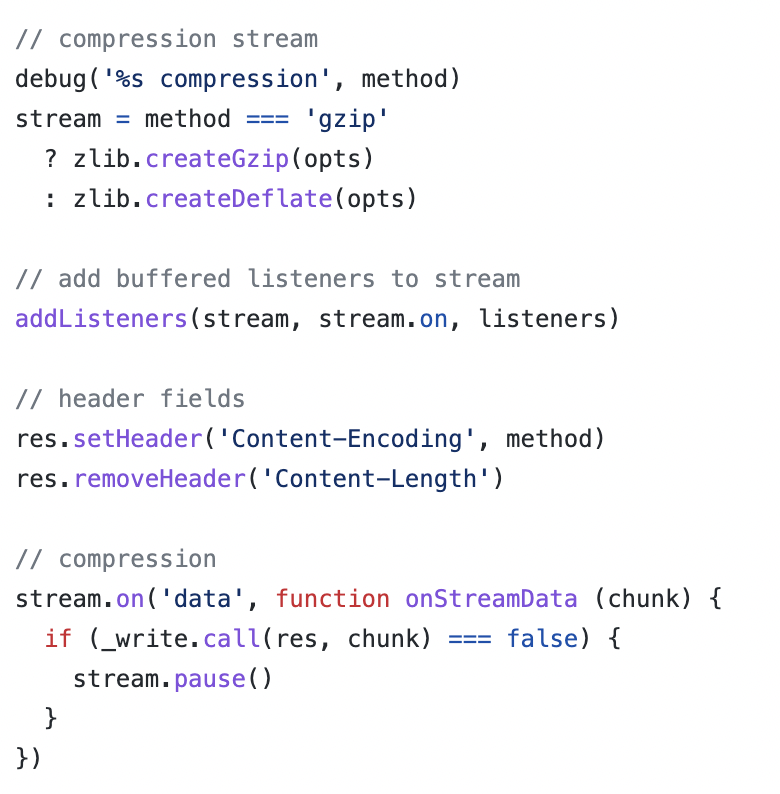
Check more here.
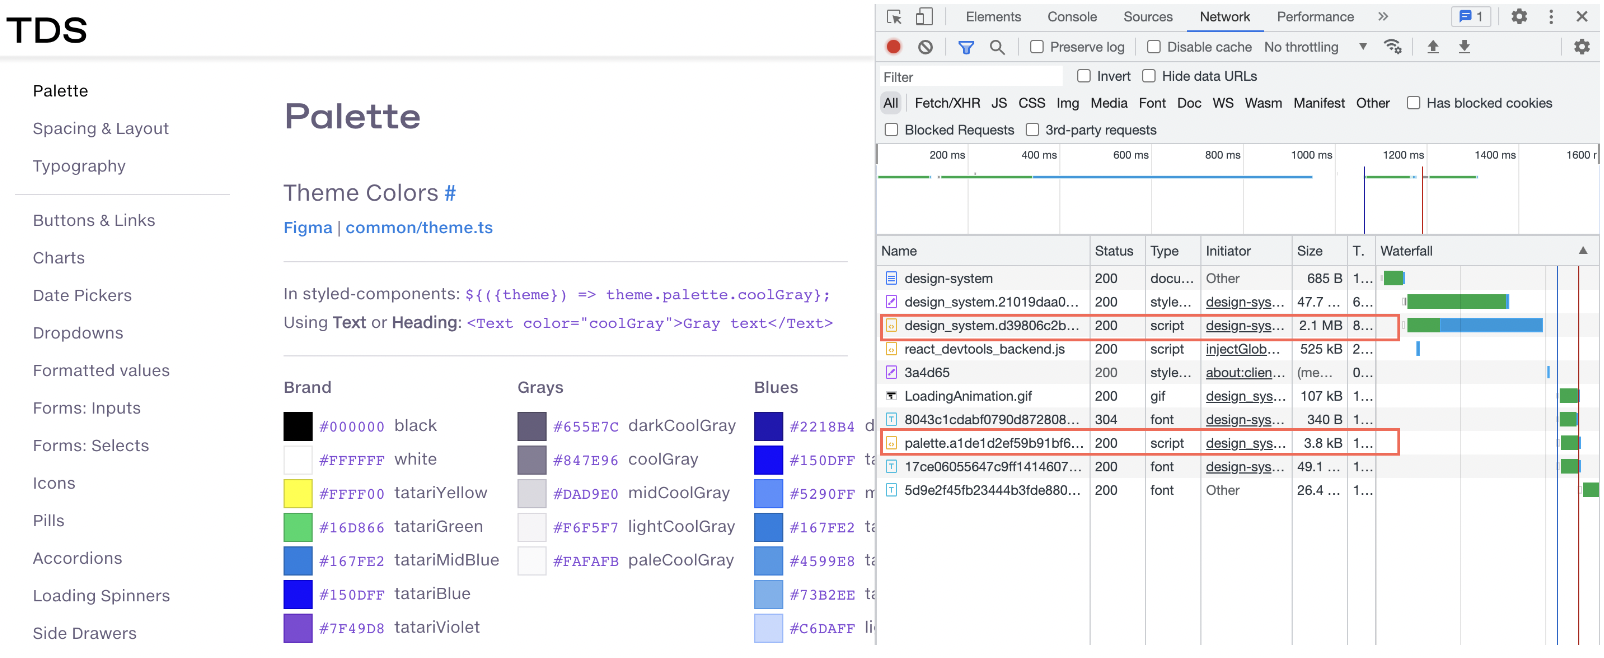
This change significantly reduced the sizes of our response payloads, by 60% on average.
For e.g. on a standard route serving 3.5 MB of resource, the finish time got reduced by nearly 60% after enabling compression middleware.
Before Compression:

After Compression:

Slowly 🚣 towards faster build tools! ⚡
Now, that we have optimized our bundles and page load speeds, we are turning our attention to speeding up our Webpack build times. To do so, we are exploring tools such as esBuild.
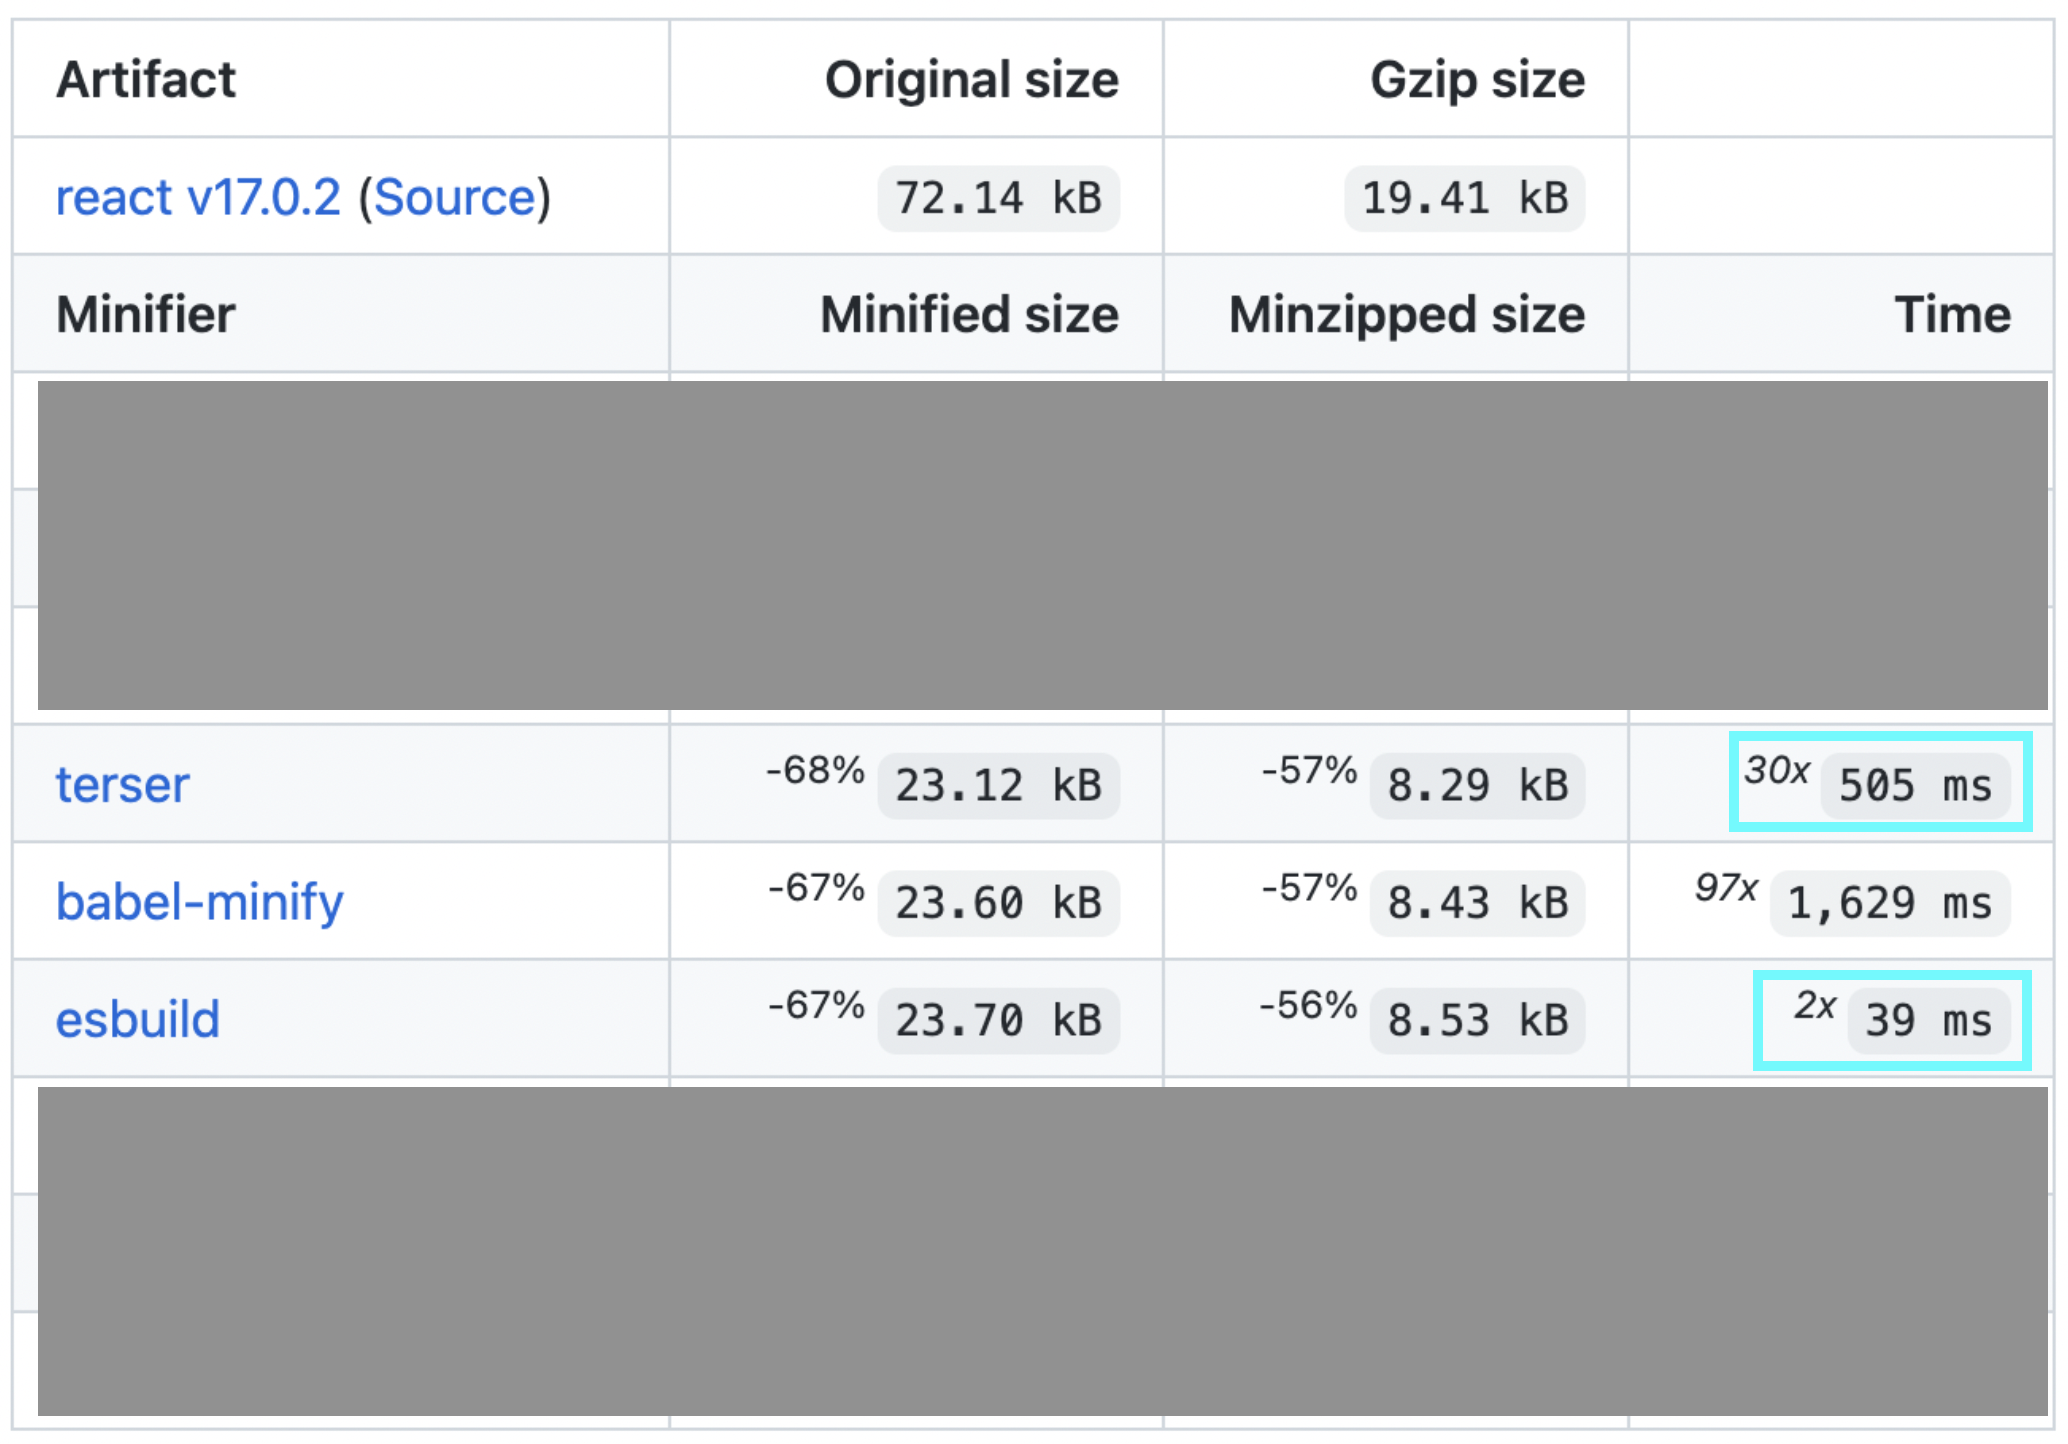
Our first step here was to configure the existing TerserWebpackPlugin to use the esbuildMinify, replacing the default terserMinify, making the minification process notably faster.
{
    minimizer: [
        ....
        new TerserPlugin({
            minify: TerserPlugin.esbuildMinify,
            terserOptions: {
                sourcemap: true
            }
        }),
    ],
}
Below is a comparison results of different minification tools on the artifact React v17. Ref.
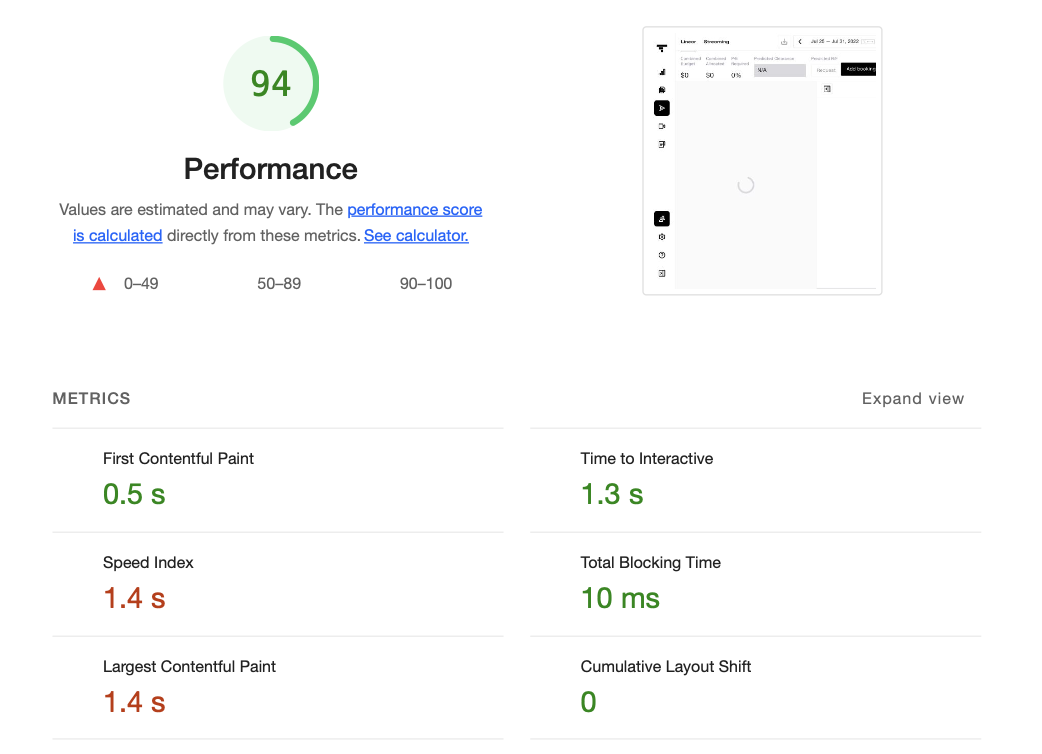
While our journey continues, the above optimizations are already bearing fruit. For instance, on our Campaign Manager a.k.a. booking app, we have experienced a Lighthouse performance score increase from 49 to 94 on average!
We continue to explore the latest approaches in order to provide our users (and developers) with the best experience and have lots of fun doing it. Thank you for reading! 🤘